





MADE IN AUSTRALIA. FREE WORLDWIDE EXPRESS SHIPPING ON ORDERS OVER AU$400.
The soft, billowy beauty of a veil can completely transform your bridal look with its movement and drape. And while we love minimalist and traditional veils, an embellished wedding veil adorned with laces, crystals or pearls can feel fresh and infinitely romantic.
The design possibilities of embellished veils are endless. From veils that are dripped in feather-soft organza blooms, to veils dotted with soft ivory pearls and dazzling crystals, embellishments add texture and detail to an otherwise blank canvas. With lengths and styles customisable to suit you, your veil can beautifully complement your body shape and dress and capture your personality.
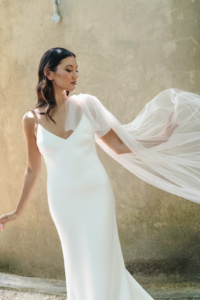
Dramatic veils also pair beautifully with modern silhouettes, from on-trend body suits to barely-there dresses. For a look that’s enchanting and sensual, find our styling tips on how to style and make a statement with your wedding veil.

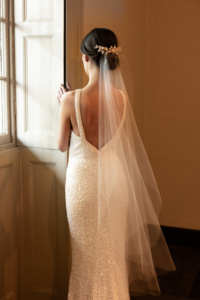
Shop this look: RIVIERA veil
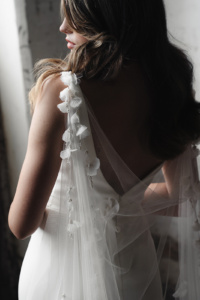
Our signature floral wedding veils are layered with lace motifs, organza flowers and bead work, with each layer adding texture and dimension. The effect from a far is romantic and dreamy, as the floral elements set onto sheer tulle give the illusion that they’re floating over you. But the veils are just as beautiful up close, where the detailed bead work can be fully appreciated.
A floral veil doesn’t need to feel heavily embellished or overwhelming. The organic details can be applied to the top of the veil only – to frame your shoulders and hairstyle – as seen in the CATALINA, WEEPING CHERRY and RIVIERA veils. If your dress is more detailed across the top with lace sleeves or a beaded bodice, the floral details can float along the train of the veil and drape behind you as walk – as seen in NIGHT GARDEN veil. If you’d like head-to-toe florals, then the ATHENA veil might be perfect for you. All veils can be made with or without a blusher layer and in varying lengths.
Pearls feel classical and timeless, and a scattering of pearls on a veil can have a modern and chic effect. Even if your look is a little more traditional, a pearl veil can exudes a more contemporary vibe compared to a more traditional or vintage-inspired lace trimmed veil.
Reminiscent of drifting snow flakes, our pearl veils are made with soft bridal illusion tulle and crystal pearls. The pearls are attached by hand, with special attention to placement, so that the overall effect is balanced, flattering and seamless.
The pearl details can be placed on the top, as seen on the THEODORE veil, or along the bottom of the veil – the LUMIERE veil. For a look that’s next level, the pearl embellishments can be applied and scattered all over. It’s everything we love about the NADIA veil. Our veils can be made with or without a blusher and available in cathedral, chapel or fingertip lengths.
Crystal accents were once only for the bling-obsessed bride. No longer a detail to be feared, our range of crystal veils have been designed to reflect a more captivating and intriguing mood. The result is added drama and romance to a bridal look – without the excessive ‘bling’ factor.
In designing our collection of crystal veils, we looked to the night sky for inspiration. Each shimmering crystal has been meticulously applied by hand to catch the light and enlighten your bridal look in an effortless, celestial and ethereal way.
One of our most versatile crystal veil designs is the airy and dramatic MORNING MIST veil. This veil features crystals that are scattered around the face, shoulders and neckline. For sparkle from head to toe, the DEWBERRY feels dreamy and dramatic without the overwhelm.
Feel free to send us an email with photos of your wedding dress and bridal hairstyle and we would be happy to send you recommendations and ideas via email.
Every wedding gown and bride is different and the perfect accessories for you will not only depend on your gown but your personal style, vision, height and style. We love to work with our brides to create the perfect veil that you will love to keep as an heirloom after your wedding day. We are based in Australia and ship worldwide.

Discover handcrafted embellished wedding veils; customisable to suit you, your wedding dress and bridal hairstyle.



When it comes to bridal styling, it’s often said your wedding veil should accentuate your bridal look and not distract from your wedding dress. We generally agree to this. But, there’s always exceptions. For a lot of brides, the look comes down to their veil and they then choose their dress that best showcases their statement accessory.
But let’s be honest: there’s no rule book. Yes, there are traditions and conventions to be respected. For example, some religious and cultural customs require brides to cover their shoulders if they wed in a church. There are also certain symbolic colours that are best avoided. But beyond the walls of religious institutions and family/cultural traditions, brides today have more freedom than previous generations to be expressive and showcase their own style on their wedding day.
Before we can explore how to style a dramatic veil, let’s explore how to choose the right veil in the first instance.
You might have chosen a dramatic wedding dress and you’re looking for a simple veil to complete the look. Or, your style might be minimal which allows room for expression where your veil is the perfect piece to capture your essence of your style and personality.
A cathedral length veil is all about regal appeal but you don’t need to have an extra long veil to create an impact. A short veil combined with handcrafted details, such as the WEEPING CHERRY veil, can be just as dramatic as a heavily embellished long veil as seen in our NIGHT GARDEN, ATHENA or RIVIERA veils.
Your veil should complement your wedding dress without overpowering it. Consider the style, shape and details on your wedding dress.
Try to define your bridal style with a few words. Free-spirited, relaxed and fashion forward? Or modern, clean and high end? If you’re struggling to find the words to best describe the vision you have in your head, a Pinterest board will help you gather your thoughts and better understand your vision.
As a general guide, your veil should accentuate and be proportional to your dress. When it comes to statement veils, we like to pair them with simpler silhouettes so that they doesn’t overpower or take away from the details of the dress.
The details on your wedding dress:
It’s important to consider the placement of any defining details on your wedding dress. Look for any focal points on the dress to ensure that the veil doesn’t interrupt the flow or details of the dress. Some things to consider include:
We love the look of a veil where it falls where a focal point begins, for example a defined waist line. Where the defined horizontal line is at the hip, we recommend choosing a shorter or longer veil so it doesn’t visually cut you in half and interrupt the flow of your look.
Colour coordination:
Ensure your veil is a complementary colour to your wedding dress. Very few wedding dresses are actually white. Most are shades of off-white, light ivory or warm ivory.
The right hairstyle can enhance the beauty of your veil and keep it securely in place.
A dramatic veil needs to be securely fastened to ensure it stays in place throughout the ceremony. We cover how to secure a wedding veil in separate post.


To quote Coco Chanel, “Before you leave the house, look in the mirror and take one thing off”. This is valuable advice generally, and especially when it comes to incorporating a showstopper wedding veil into your bridal look.
If you’re fond of dramatic wedding dress, minimise the rest of your wedding accessories. Think simpler shoes, and choose one or two other elements to complete your look such as pearl drop earrings or a delicate bridal tiara.
We’re here to help. We work with brides worldwide to help them coordinate and choose the perfect wedding accessories from our collections.
Feel free to send us photos of your wedding dress, bridal hairstyle and details of styles from our collection you love and we can go from there.


For brides dreaming of a captivating bridal look, a lightweight and dreamy crystal wedding veil paired with intricate bridal accessories can be the perfect elements to bring that vision to life. Crystal wedding veils can frame a wedding dress in the most effortless way – whilst offering that hint of magic that can complete a bridal look without feeling over-the-top.
The veil is often the most iconic bridal accessory, and choosing one adorned with a galaxy of crystals can instantly elevate your look. Crystal veils add a touch of enchantment, catching the light as you move and creating a subtle yet mesmerising sparkle.
Consider the overall style of your wedding when selecting your veil. A cathedral length veil with scattered crystals offers a dramatic, fairytale effect, perfect for grand ceremonies in large venues. For a more intimate or modern setting, a fingertip length veil with crystal edges might be more appropriate, adding the right amount of sparkle without overwhelming your look.
Ensure the veil complements your wedding dress. If your gown has intricate beading or embellishments, opt for a veil with subtle crystal accents to avoid clashing. For simpler gowns, a more heavily embellished crystal veil can add that wow factor.
Once you’ve selected your veil, it’s time to think about how to enhance your hairstyle with hair accessories. The right piece will add a touch of elegance and sophistication, pulling together your look in the most breathtaking way.
While the veil and hair accessories are the stars of your bridal ensemble, delicate jewellery can tie everything together, adding a final touch of sparkle.
The most important aspect of creating a captivating bridal look with a crystal veil is achieving balance and harmony. While it’s tempting to go all out with crystals and embellishments, sometimes less is more. Choose one or two statement pieces, such as a crystal veil and a matching headpiece, and keep the rest of your accessories more subdued.
Ensure that all your accessories share a similar aesthetic. Whether you’re going or vintage, bohemian, or modern glam, your veil, hair accessories and jewellery should complement each other in style and tone.
Sometimes you don’t want head to toe sparkles. Sometimes, it’s just a hint of sparkle maybe at the edge or near the comb that can make all the difference. Or it could even be sparkly crystal hair accessories paired with a simple long wedding veil that completes your bridal look.
If you’d love to chat about how to style your wedding dress with the right accessories from our collection, feel free to get in touch. We’d love to work with you.
Discover exquisite bridal accessories adorned in Swarovski crystal elements; customisable to suit you and your wedding dress.


Whether you’re getting married in a church or out in the outdoors, a long wedding veil can add the perfect amount of grandeur and drama to a wedding dress. A long veil is, without a doubt, the defining wedding accessory that can instantly transform a bridal look with its timeless appeal and elongated silhouette.
A ‘long’ wedding veil is a relative term. How long is long? How long is a piece of string? What’s long for one bride might barely touch the floor for another. Throw in the added complexity of the length and width of the train on your dress, your height, your heel height, your venue… It’s no wonder it can be difficult to determine the best length for you.
We’ll guide you through the key factors to consider when selecting the best long wedding veil for your special day.
Is a floor length, chapel veil or cathedral veil best for you? This is where it can get a bit grey. Why? Because so much depends on the style of your dress, the fabric it is made from, your height, and any distinctive horizontal lines that are visible on the dress.
Some brides like their veil to extend beyond the length of their train so their train and dress appear longer and grander. Other brides choose to have their veils puddle on the train so that it blends into the fabric of the skirt and won’t get in the way on the dance floor. And other brides want their veil to fall exactly to where their dress train ends as a longer length might feel excessive. It’s very much a personal preference.
The floor length veil is your introduction to long wedding veils. As the name suggests, a floor length veil is designed to gracefully touch the floor and is ideal for sheath or fitted wedding dresses without a train. We love to suggest a floor length veil for more casual weddings or for brides who want to wear their veil all day and all night – including for the bridal waltz. Our made to order mandate means we can design your veil your way – whether you love to have it pooling a little on the ground, or not quite reaching it. It’s up to you!
A beautifully versatile length, we love the chapel veil for its timeless beauty. A chapel veil complements a wide range of wedding dresses, from ballroom gowns to dazzling red carpet worthy dresses. For the vertically challenged brides, we find that veils that create a little puddle on the floor elongate the silhouette which always looks incredible.
If you want to make a statement, this is your go-to veil. The cathedral veil is grander than the versatile chapel veil and is best suited for cathedral and church weddings with long aisles. Some useful advice to know is that longer veils are often wider too. So bare in mind the potential proportions of your veil to your dress.
Lastly, we have the ever glorious royal cathedral length veil. Measuring anywhere from 4 metres plus, this fabulous length looks amazing for medium to taller brides with a very long runway to walk down.
The fabric your wedding dress is made from is an important factor in choosing your wedding veil.
A gown made from structured satin or frothy tulle fabric will provide structure to a veil as the dress will act as a frame on which the veil will sit. We recommend veils made from bridal illusion or Italian tulle which is a lightweight and crisp tulle which will suit the nature of firmer and floatier fabrics.
If your dress features a flowy sheer fabric, a softer drape on the veil is an option. These veils are often made from English net. Flowy fabrics also suit bridal illusion tulle as these floatier veils add an ethereal quality to your look.
There are multiple horizontal lines that are visible on a dress. It could be the line that runs across your shoulders on an off-the-shoulder neckline. Or the line that’s created on a plunging back. Or there’s the line where the bodice is sewn onto the skirt at the waist on a ball gown. Or perhaps even a peplum detail. There can also be lines further down if your dress features a mermaid silhouette where the skirt starts to flare out above the knee.
The lines on a dress aren’t limited to the neckline or the silhouette of the dress. There can also be lines in the patterns of the lacework or the fabric. Think ruffles on a skirt or a dress where multiple laces are mixed and matched to create a distinctive pattern.
The importance of lines comes back to not wanting to take away from the beauty of the dress. Adding a new line with a shorter veil can interfere with how the dress flows. For example, if your dress features an oversized bow on the back, it’s best to avoid a veil that falls to the same spot.
A veil that’s 2 metres long will look very different on a bride who is 4’9 compared to a bride who’s 6’1. This doesn’t mean a bride on the shorter side should only wear a shorter veil and that long veils aren’t an option.
Quite the opposite. A shorter bride can certainly wear a long veil so long as the veil isn’t excessively long in proportion to her silhouette. There are many shorter brides who wear wedding gowns with long trains and similarly, her veil can be just as long. The key is to ensure that the silhouette overall is balanced.
There are thousands of wedding dresses out there so we understand that finding the perfect veil can be difficult. What you find on the rack in bridal boutiques may not be the right length, width or colour for your dress.
We work with brides worldwide to offer recommendations and styling advice. We have over 15 years experience designing and handcrafting wedding veils and bridal accessories.
Feel free to send us an email with photos of your bridal look and we’d be happy to get back to you with ideas on how your favourite veil can be customised to suit you.
One of our favourite wedding looks combines two timeless accessories—wedding veils and headpieces—to create a beautifully layered, multi-dimensional bridal style. Whether you’re going for a classic, romantic vibe or something more modern and cic, layering a veil and a headpiece adds depth and personality to your look. But achieving this balance requires careful consideration of styles, textures and placement. In this post, we’ll guide you through the process of layering a wedding veil with a headpiece, offering practical tips to ensure your accessories complement each other perfectly.
When layering a veil with a headpiece, the first step is selecting pieces that work harmoniously together. Here’s how to approach this:
Consider the veil length and style: The length and style of your veil will influence the type of headpiece that pairs best with it. For example:
Match the aesthetic: Your veil and headpiece should share a similar aesthetic to create a cohesive look. If your veil is adorned with lace or beading, consider a headpiece that features similar details. Conversely, if your veil is simple and understated, a more ornate headpiece can add the right amount of flair and accentuate the details on the back of your wedding dress.
Coordinate with your dress: Ensure that both the veil and headpiece complement your wedding dress. For example, if your dress has a lot of intricate detailing you might opt for a simpler veil and headpiece to avoid overwhelming your lookd.
The way you position the veil and headpiece can dramatically affect your overall bridal look. Here are some tips for getting it just right:
When choosing your bridal comb, consider its proportion relative to your veil comb. You’ll be positioning them next to each other so size is important. The body of your bridal headpiece should be wider (longer) than the width of your veil comb. So if your veil’s comb is 3 inches long, your headpiece needs to be at least 4-5 inches long.
Choosing to have a separate veil and headpiece rather than one that is sewn together offers several key advantages in terms of flexibility, styling options and practicality.
The more accessories you have in your hair, the greater the base that is needed to support them. We suggest the layered look is best suited for an updo, but a half-up half-down or even loose wavy hairstyles can be achieved using a few simple techniques to secure those metal hair combs.
If you are wearing your hair all down, your hairstylist will most likely create a hidden foundation under the hair to support the piece in your hair. These extra precautions (extra hair pins!) will securely hold the headpiece and veil in place.


Once the veil is secured into place with bobby pins, you’re now ready to position the headpiece and pin it into place. It’s best to secure the veil first and then the headpiece on top of the veil’s comb for a more seamless finish.
When styling your wedding comb and veil, make sure you take into account how they’re constructed. If you have two central combs (one on the veil and one in the middle of the headpiece), it will be possible to layer them one of top of the other but it may be more of a headache – literally – than it’s worth.
Look for headpieces designed around a split comb system or headpieces which don’t feature a comb at all. This way you can easily position the veil, position the headpiece and easily secure them into place. The two comb system is signature to our brand – we feel two combs allows extra flexibility with style around various hairstyles and head shapes. And of equal importance, it means you can style your headpiece with a veil. Just ensure the combs are wide enough to sit either side of the veil’s comb.
Need styling advice to bring together your bridal look? Get in touch with photos of your wedding gown and your favourite pieces from the collection. We would love to offer ideas and recommendations on pieces to suit, including how our pieces can be customised to suit you.
Designed to be worn with or without a wedding veil, discover customisable bridal headpieces for you.


There’s few opportunities in life to wear something as exquisite and elaborate as a wedding veil. While a veil may not be for every bride, we love how a veil can elevate your bridal look by framing your face, and elongating your silhouette. One question many brides face is how to position their wedding veil, particularly when they’ve chosen a bun hairstyle. Should the veil be placed above the bun, creating a classic, elegant look? Or is positioning it below the bun a better option for a modern and relaxed style? The answer depends on your personal style, the look you want to achieve, and practical considerations. Let’s explore the pros and cons of each option to help you make the best decision for your big day.
Placing the veil above the bun is a traditional option that creates a timeless, elegant silhouette. This placement allows the veil to cascade down from the crown of your head, often creating a more dramatic and regal look.
Pros:
Cons:
Opting to place the veil below the bun is a more contemporary and relaxed choice. This placement allows the bun to remain the focal point, with the veil draping softly down your back.
Pros:
Cons:
When deciding on veil placement, think about how it will complement your overall bridal look, including your dress, accessories, and the vibe of your wedding.


We love to work with our brides to bring together their bridal looks. Feel free to email us photos of your wedding dress and hairstyle. We’d love to get back to you with some veil options and how best to style them.
Congratulations on finding your dream dress! If a wedding veil is what you envisage for your bridal look, you’ve come to the right place. Join us as we explore the various options available and we share our expert guide to help you find the perfect veil to complement your dress. The right veil can elevate your bridal ensemble, adding a layer of romance, tradition and modern flair to your wedding day. But with so many lengths, widths, styles and embellishments on offer, it’s no wonder that many brides-to-be planning their weddings can feel a little overwhelmed. Take your time, try on different options, and choose a veil that makes you feel like the best version of yourself. After all, your veil is more than just an accessory—it’s a symbol of the bride you’ve always dreamed of being.
The first step in finding the right veil is to consider the style and shape of your dress. As a general guide, your veil should accentuate and be proportional to your dress. This means it shouldn’t overpower or take away from the details of the dress. Doing so can be distracting and also interrupt the flow of your overall look.
Look for key focal points on your dress as guidance for your veil. Often a veil will look best cut just above or below any horizontal lines. If your veil falls where a focal point begins, for example a defined waist line, this will feel effortless and proportional.
Veil length is one of the most important factors to consider. Here’s a quick overview of the most common veil lengths and how they pair with different dress styles:
Generally speaking, a fingertip veil is a timeless and classic option that works beautifully with a range of different wedding dresses. It is also a versatile choice for a range of different venues – from the church to a beach or garden wedding.
Matching the colour of your veil to your dress is crucial for a cohesive look. Wedding dresses come in various shades of white, ivory, champagne and blush, so your veil should complement this tone as well as you can.
The details of your veil can either enhance or detract from your overall look, so it’s important to choose wisely.
Your hairstyle will affect how your veil sits and how it’s secured. If you choose to wear a veil, your veil may need a supportive base such as a bridal bun, messy updo, or half up/half down hairstyle. The longer or heavier your veil, the more supportive your bun or hairstyle will need to be.


While the aesthetic of your veil is important, it’s also important to think about the practicality of wearing a veil. Take into account the venue and potential weather forecast. If you’re having an outdoor wedding, the wind will be an issue. Longer veils can get caught in the breeze, so you may wish to opt or a shorter style or one that can be easily removed after the ceremony.
It’s important to make sure your veil is lightweight and easy to wear. You’ll be wearing it for several hours, so comfort is key.
We also recommend someone from your bridal party knows how to remove the veil after the ceremony if you plan to take it off for the reception. This may include asking the hairstylist how many bobby pins have been used to secure the veil into place so you can remove the veil without damaging your hairstyle.
Every wedding gown and bride is different and the perfect accessories for you will not only depend on your gown but your personal style, vision, height and hairstyle. We love to work with our brides to create the perfect veil that you will love to keep as an heirloom after your wedding day. Get in touch with us – we would love to hear from you!
A birdcage veil adds a timeless, vintage elegance to your bridal look. While bridal trends may come and go, the chic sophistication of a birdcage veil remains a beloved choice for brides who want to complete their ensemble with a touch of classic glamour.
If you’re excited to include this stunning accessory in your wedding day attire but are unsure how to secure it, scroll below for our top tips.
Securing a birdcage veil is simple, once you know how. With just a few bobby pins and a mirror, you can achieve a flawless look. Don’t worry if it feels tricky at first—wearing a birdcage veil is a unique experience, but with a little practise, you’ll master it in no time.
Decide where you want the veil to sit—typically, it’s placed at an angle, covering one eye or just grazing the forehead. Experiment until you find a place that feels comfortable, frames your face shape and complements your hairstyle.
When positioning the comb, ensure the birdcage netting isn’t caught in the teeth of the comb as this may damage the veil and distort the shape of the veil.

Shop this look: MARA birdcage veil
Use bobby pins to secure the veil’s comb or clips into your hairstyle. Make sure they are hidden and secure.
We recommend bobby pins that are similar in colour to your hair. The number of pins will depend on your hairstyle as well as the thickness of your hair. As a guide, start with 2-3 pins and use as many as you need until the veil feels secure.
Carefully pin the netting down into your hair by threading the bobby pin through one or two of the diamond shaped patterns. The key is to ensure the bobby pins are hidden so to the untrained eye, it will look like the veil is part of your hairstyle.


Shop this look: SHADOW birdcage veil, ALESSI blush birdcage veil, NOUVEAU birdcage veil
Carefully adjust the veil to ensure it lays perfectly and does not obstruct your vision or catch on your eyelashes.
We recommend the veil sits above your lips so lipstick doesn’t transfer onto it or get in the way of any sneaky kisses with your beloved.
With these easy steps, you’ll be ready to walk down the aisle with confidence and vintage charm.
Explore our collection of bespoke and ready-to-wear birdcage veils. Worldwide shipping and rush orders available.


